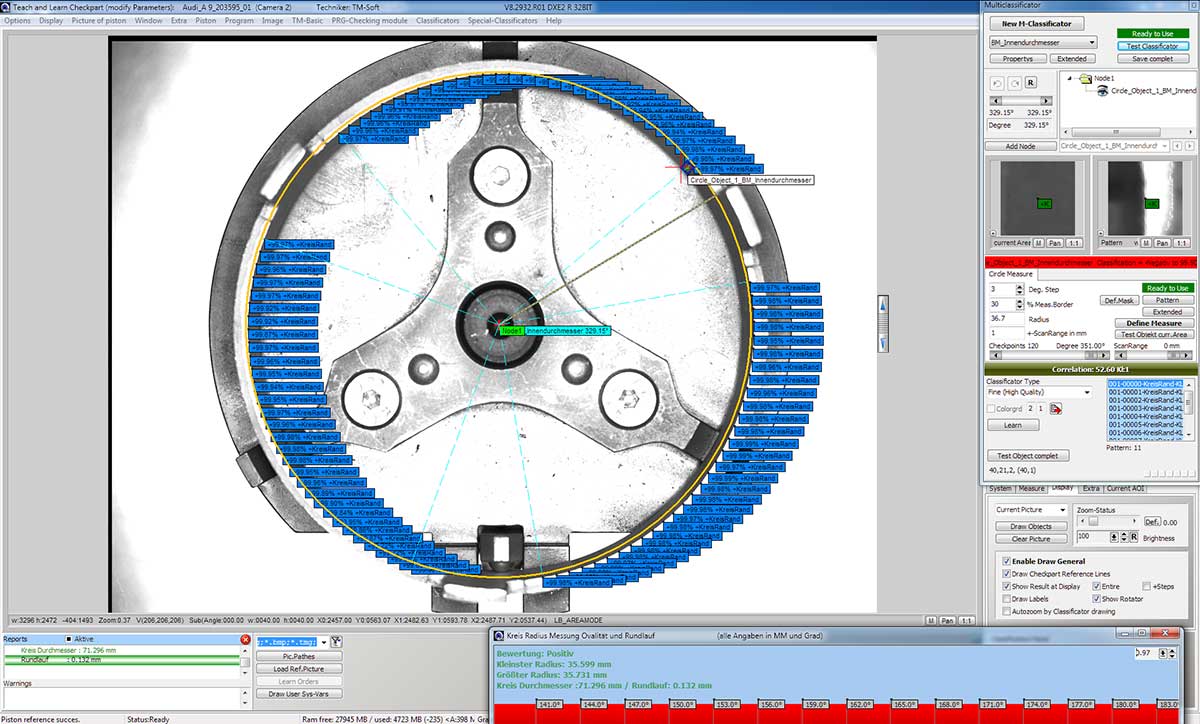
Concentricity Control
Picture 1 shows a synchronizer ring that is scanned at the inside diameter. By doing so, over 60 measuring points are allocated. The biggest and the smallest diameter is determined, as well as the ovality and the concentrity. This is shown in picture 2. The graphic is zoom- and scrollable. The graphic shows in the green area the upper and the lower tolerance and the individual measured values.
Are you interested in a demo-presentation?
Send us an e-mail. We will contact you near-term.


